|
Page 23.02 Side Skins
|
|
Note: This page describes making the left longeron. The right is
a mirror of the left.
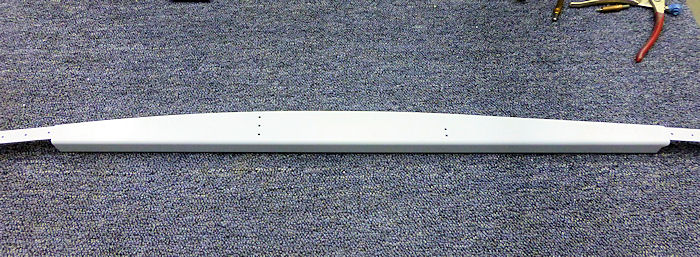
Step 01: Cut
the F-1255-L and R Longerons from AA6-125 X 3/4" X 3/4" per the
dimensions in Figure 1. |
 |
|
Step 01B: Optional trim for weight
savings. |
|
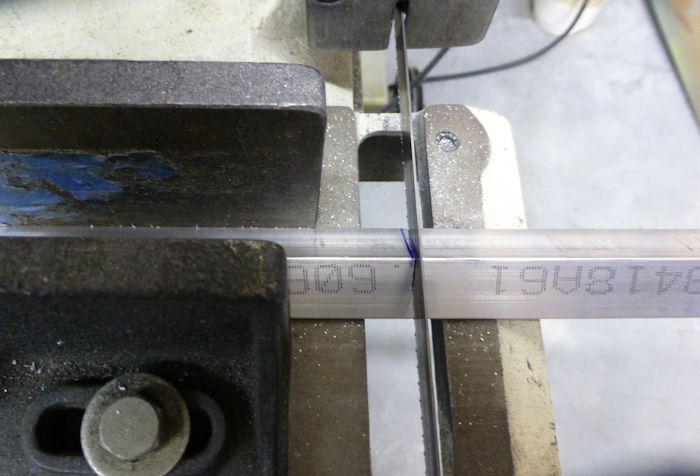
Step 02: Mark the end
of the twist, start at and end the curve, aft end of template and start
of bend lines on the F-1255-L and R Longerons as shown in Figure .
01/19/13 |
 |
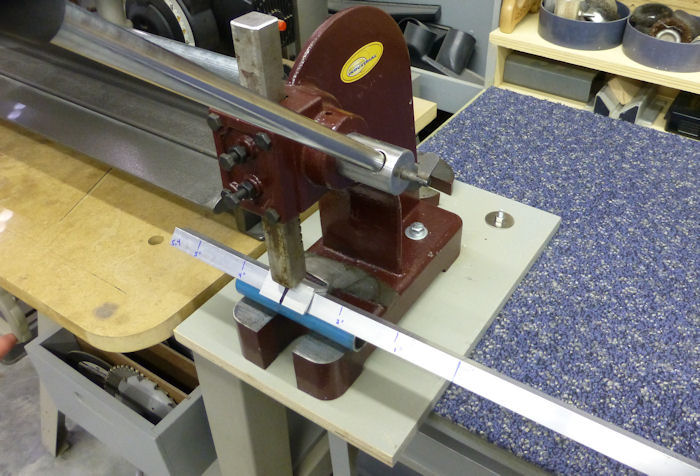
Step 03:
Open the angle of the longeron as shown in Figure 4 from the start of
the longeron to the end of the twist & open line as shown in Figure 1.
Clamp the longeron in a padded vise at the end of the twist ( 12 11/16"
) & open line as shown in Figure 1. Use a crescent wrench as shown in
Figure 3 to twist the longeron inboard as shown and per dimensions in
Figure 1. When finished the top faces of the of the longeron both for
and aft of the end of twist and open should lay flat against a table.
01/19/13
Builder Note: Mark at about every 2.35" for one
degree steps. Down pressure on the handle and a light hit with a soft
faced hammer on top of the rack gear works well for a very even
transition. |
 |
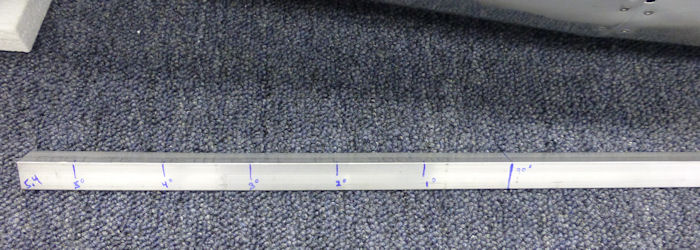
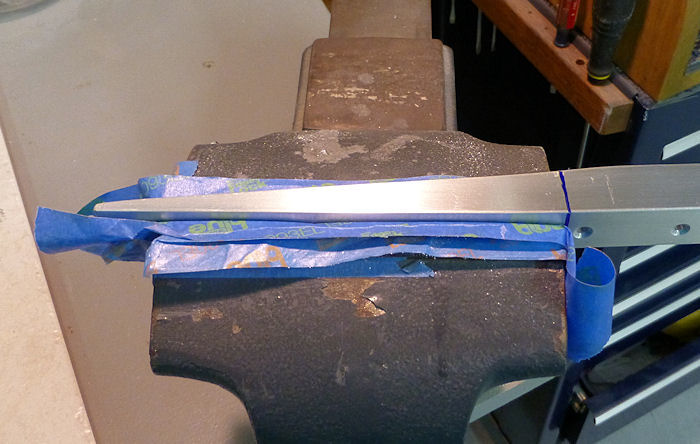
Step 04: Clamp The
F-1255-L Longeron in a padded vice at the start of the curve line and
pre load the free end. Using a rubber mallet, firmly strike the longeron
adjacent to the vice to produce a bend. Repeat this process at one inch
intervals to produce a curve that matches the Template ( F1234-L Canopy
Deck ) within a 1/16 of a inch. See Figure 1.
01/19/13
Builders Note: Mark every 3/4" and number to accomplish a very smooth
bend
|
 |
| Check the curve
often to prevent over bending. The longeron can be placed in a six-inch
vice without removing any of the bend, so it is easy to add more curve
later. |
Remove curve by clamping the the mid fuse longeron at the
required point and pulling back slightly.
Check that the mid fuse
longeron does not bend out of plane vertically as it being bent in the
horizontal direction. If this occurs, rotate the mid fuse longeron 90°,
clamp it in a vice, bend it back straight with your hands, then recheck
the curve with the template. |
| Step 04B: Clamp the longeron
at the start of bend line at aft portion ( 76 3/8 " ) of the longeron as
shown in Figure 1. using the method described above bend a single bend
in the longeron as shown in Figure 1. As before check that the angle has
not bent out of plane and adjust as before |
 |
| Step 05: Deburr the
edges of the F-1234-L & R Canopy Decks. |
 |
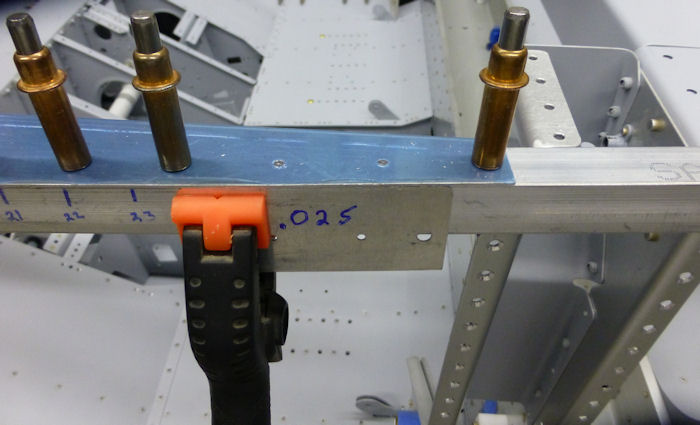
Step 06:
Using a scrap piece of .025 thick aluminum to simulate the F-1270
Fuselage Side Skin, position the F-1234-L Canopy Deck to the F-1255-L
Longeron as shown in Figure 2 ( the canopy deck will overhang the
longeron by .025 ). Flush the aft edge of the canopy deck with the aft
end of the template mark, then clamp the parts together. Match-Drill #30
the longeron using the canopy deck as a drill guide. Take care when
drilling to ensure that the drill is perpendicular to the canopy deck.
Repeat this step to match-drill the F-1255-R Lonreron. |
 |
| Step 07:
Deburr the F-1255-L & R Longerons. |
|
|
Page 23.02 Side Skins |
|
