|
Page 32.10: FLIGHT
CONTROLS |
|
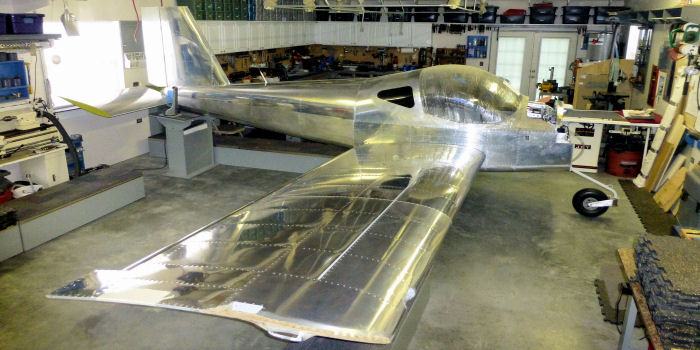
The
aircraf was turened in the shop to install the wings.
08/26/17 |
 |
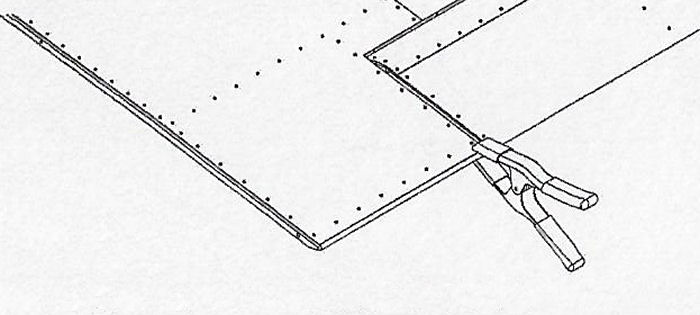
| Step 01:
On both wings, use a clamp to align the Flaperon and wing trailing edges
as shown in Figure 1. |
 |
| Step 02: Flush the ends
of the WD-1214-L & R Flaperon Torque Tubes with the brackets of the
WD-1215-L & R Flaperon Toque Arms as shown in Figure 2. If the A-1207-L
& R Actuation Brackets on the Flaperon ( see Page 32-09, Figure 3 )
force the Flaperon torque tubes to extend beyond the brackets, trim the
actuation brackets until the Flaperon torque tubes are flush. |
 |
| Step 03: Insert a
temporarily 0.063 spacer between the WD-1214-L & -R Flaperon Toque Tubes
and the WD-1215-L & -R Flaperon Torque Arms as shown in Figure2, then
clamp the parts together |
Step 04: Mach-Drill #30
( use 12 inch extension drill bit ) the two holes of the Wd-1215-L & -R
Flaperon Torque Arms into the WD-1214-L & -R Flaperon Torque Tubes ( one
side only eco the first hole before match-drilling the second ). |
| |
|
| Step 05: Remove the
wings, then remove the Wd_D-1214_L & -R Flaperon Torque Tubes from the
fuselage. |
|
| Step 06: On the work
bench and with the .063 spacers in place, cleco together the W-1215-L &
-R Flaperon Torque and WD-1214-L & -R Flaperon Torque Tubes using the
previously match drilled holes. reapply the clamps. |
|
| Step 07: Match-Drill
#30 the holes in the other side of the WD-1215-L & -R Flaperon Torque
Arms into the WD-1214-L & -R Flaperon Torque Tubes. |
|
| Step 08: Final-Drill #
12 all the way through both sets of holes ( insert a bolt after
final-drilling the first set ) in the WD-1215-L &-R Flaperon
Torque Arms and WD-1214-L & -R Flaperon Torque Tubes. |
|
| Step 09: Reinstall the
WD-1215-L & -R Flaperon Torque Arms ( Page 32-06 ), then attach the
WD-1214-L & -R Flaperon torque Tubes using the hardware called out in
Figure 3. |
|
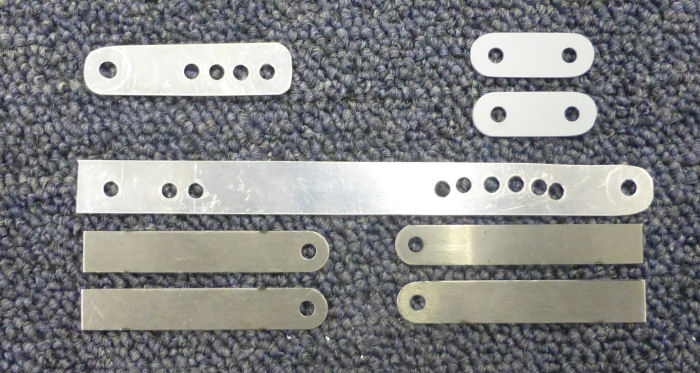
Step 10: Separate the
F-1258 Rudder Cable Links by removing the shaded areas shown in
Figure
4.
Builder Note: I Made some test samples before drilling the
final links.
12/25/13 |
 |
| |
|
|
Page 32.10: FLIGHT
CONTROLS |
|
