|
Page 32.06: FLIGHT
CONTROLS |
|
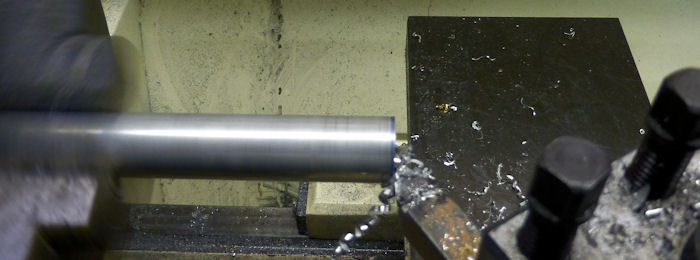
Step 01:
Make the two Flaperon Pushrod Assemblies using the F-1265 Flaperon
Pushrods and the hardware called out in Figure 1. After drilling,
remember to mark the parts for reassembly.
Builder Note: Cut to
length and square off in lathe.
11/16/13 |
 |
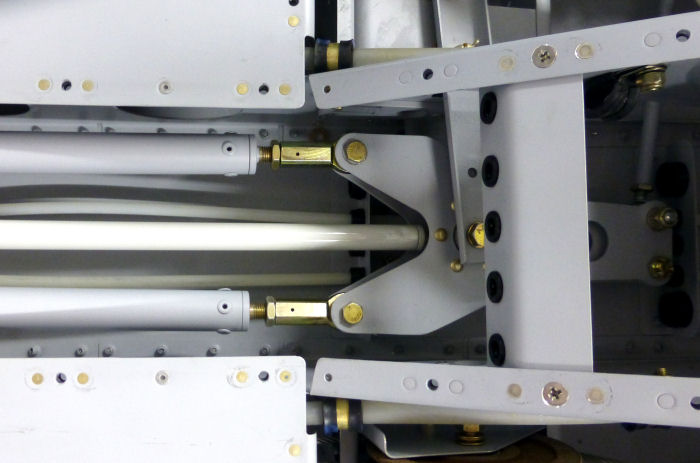
Step 02: Pass the two
Flaperon Pushrod Assemblies through there corresponding oblong holes in
the F-1204A 7 D Center Section Bulkheads and the center lightening hole
in the F-1206A Bulkhead.
Step 03: Bolt the
forward end of both Flaperon Pushrod Assemblies to the F-1263A & B
Flaperon Mixer Bellcranks using the hardware called out in Figure 2.
02/08/14 |
 |
Step 04:Bolt the
WD-1215-L & R Flaperon Torque Arms to the F-1206D Bearing Brackkts using
the hardware shown in Figure 3.
|
No Photo |
Step 05: Attach the aft
end of the Flaperon Pushrod Assemblies to the WD-1215-L & R Flaperon
Torque Arms using the hardware called out in Figure 3.
02/08/14 |
No Photo |
| |
|
|
Page 32.06: FLIGHT
CONTROLS |
|
